Zoom/Microsoft Teams Mute Button using CircuitPython

I wanted to create a simple project using Adafruit’s new QT Py microcontroller and CircuitPython. I decided to make a simple mute button for video conference tools since I spend a lot of my work hours in meetings using either Microsoft Teams or Zoom. There have been many of these made since the start of the pandemic, including the PyRuler version featured in an Adafruit learn guide, but I wanted to make a smaller single button version that could work with multiple applications.

Parts

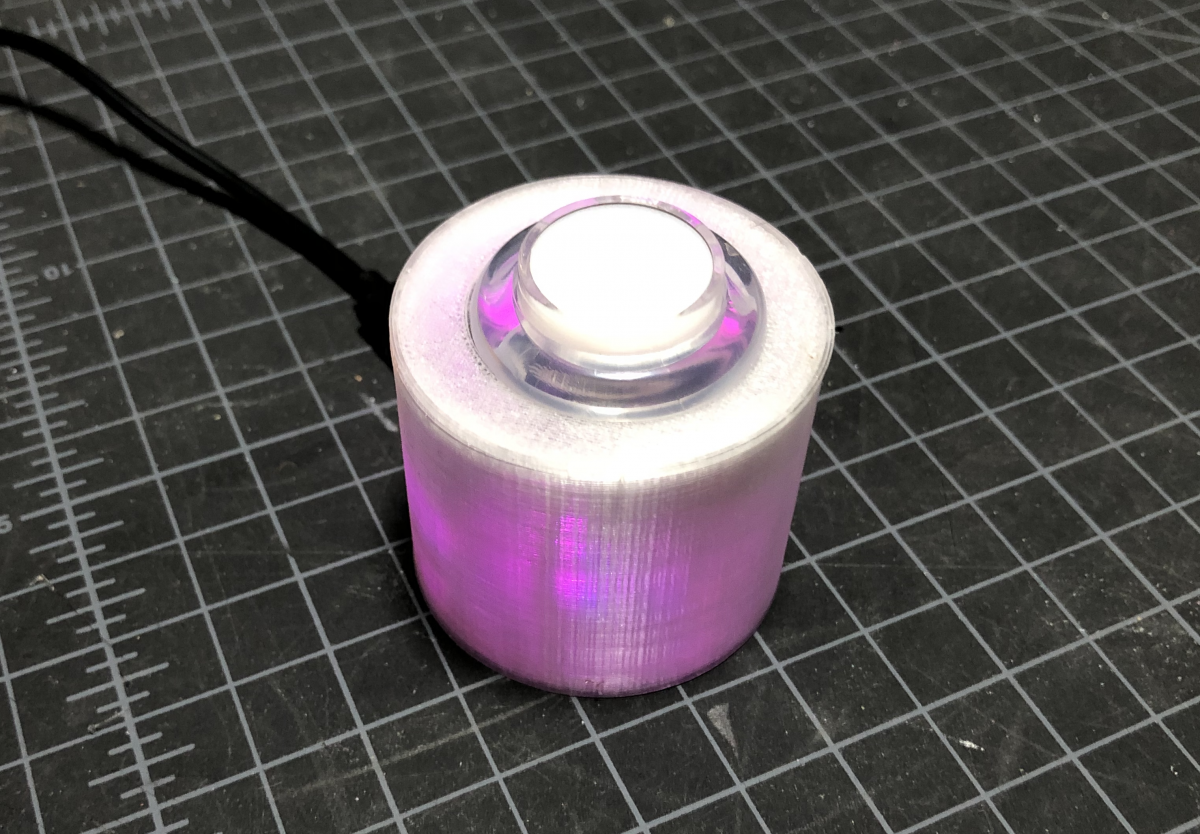
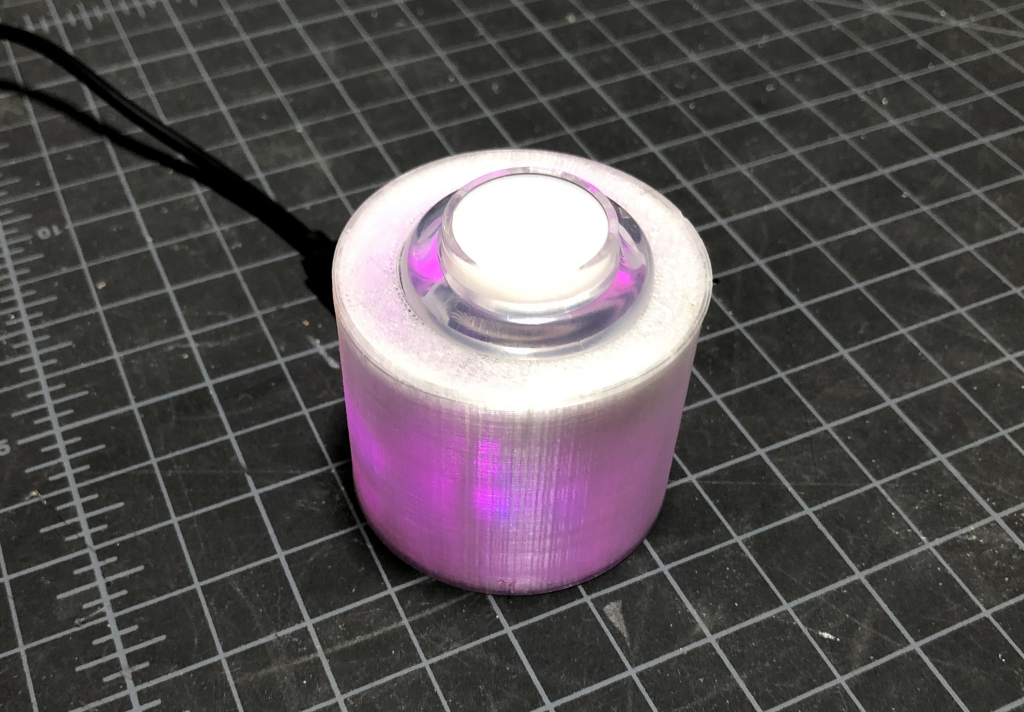
3D Printed SnapFit Enclosure

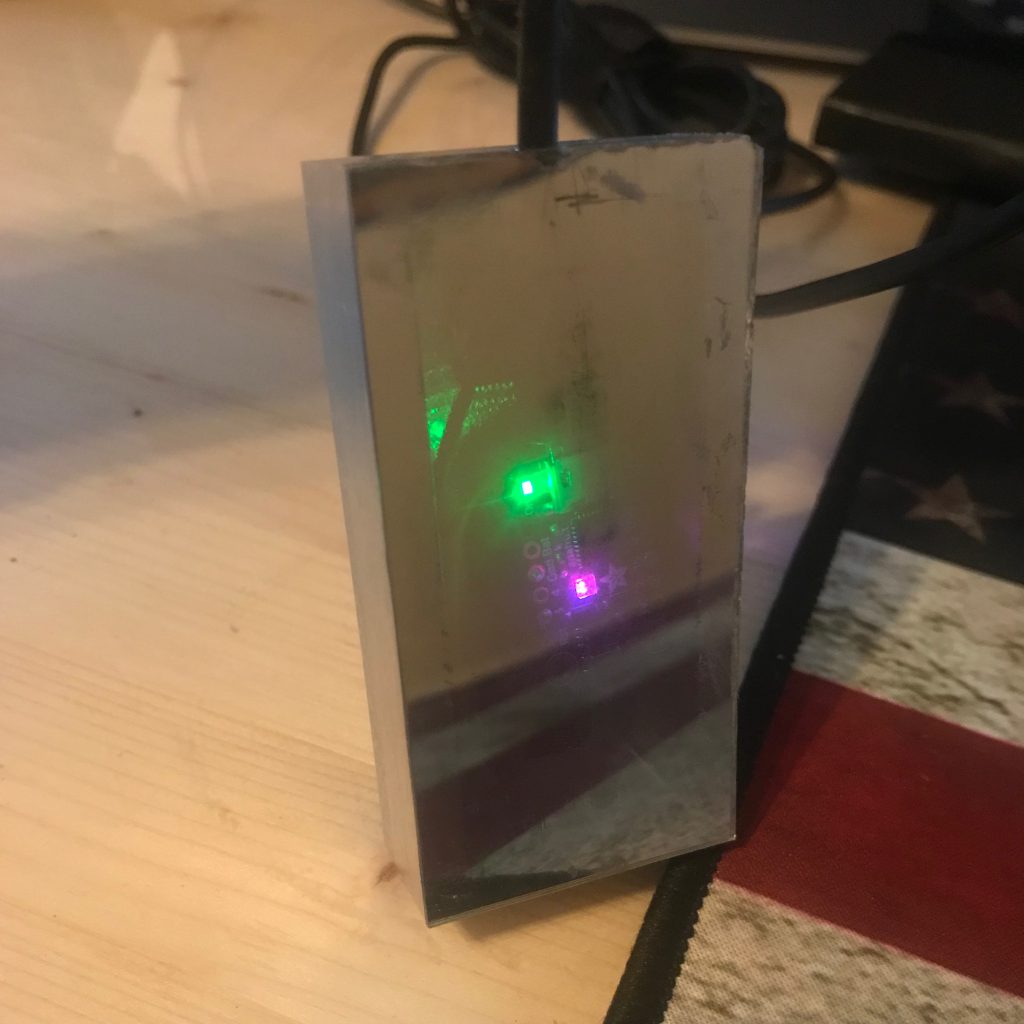
I followed Noé Ruiz (@ecken) Layer by Layer tutorial below to make a circular SnapFit case to hold my project (STL/Fusion360 Files). There are several things that could be improved in this design, but it is a start. The Fusion360 file has User Parameters if you want to change the diameter or the height of the enclosure. I printed my enclosure using semi transparent PETG to enable the user to easily see the color of the onboard neopixle. This is helpful for knowing what application/shortcut is active.
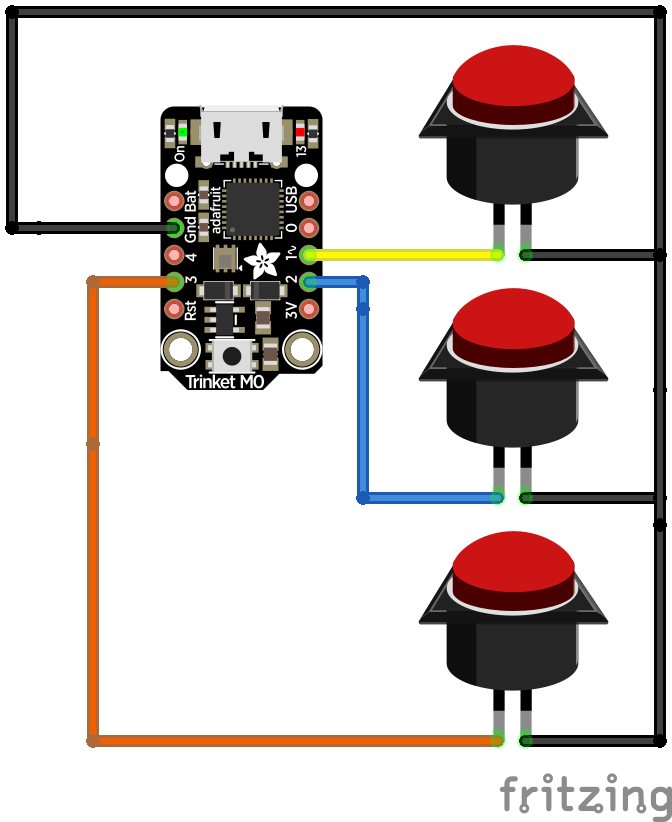
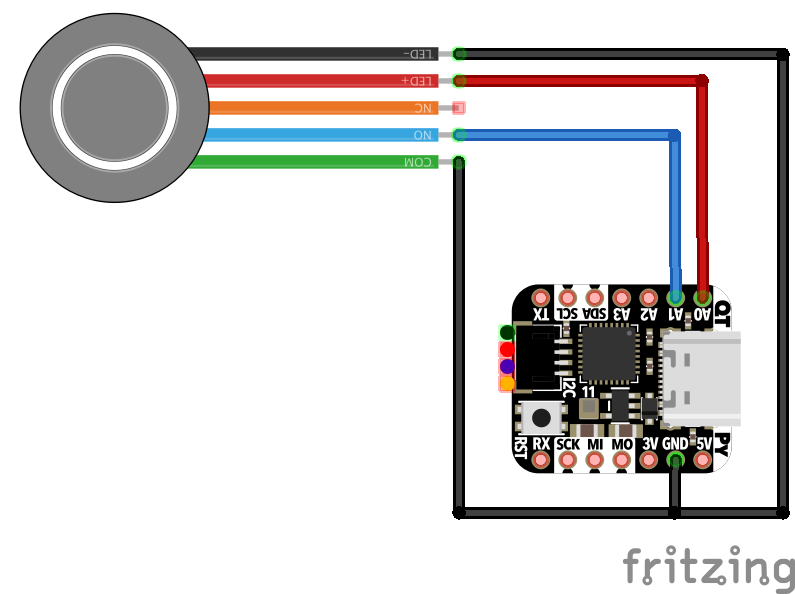
Wiring

The fritzing schematic is below. Please note that the button I used didn’t have a NC connector, but I couldn’t find a similar part in the fritzing library.

Code

Below is the code for this project. Modify the controller_buttons variable to add or remove applications and shortcuts. The current code is made to work using Microsoft Teams and Zoom on a Mac. The keycode for each application/shortcut would need to be modified if you are using Windows or Linux. The color updates the neopixle on the QT Py to allow the user to know which application/shortcut is active. I used purple for Teams and blue for zoom.

https://gist.github.com/jfurcean/b2834bc05f5599a23253b392075b390d

Please see Adafruit’s Primary Guide for setting up the QT Py with CircuitPython. You will need to copy the following CircuitPython library files over to your QT Py as well.

  • adafruit_hid/keyboard
  • adafruit_hid/keyboard_layout_us
  • adafruit_hid/keycode
  • neopixel

The strip_xattr.sh script is very helpful if you run into problems copying the required library files over to the QT Py on a Mac. For more information about this issue see the Adafruit Forum post from user aaaidan.

Use

  1. Plug it into your computer.
  2. Press the button to activate the active application’s keyboard shortcut
  3. In order to change the keyboard shortcut that is active, hold down the button until the onboard neopixel changes colors

Please note that the led on the arcade button is currently set to toggle every time it is pressed. It is up to the user to manually sync it to there current application if they want to use it as an indicator if they are currently muted or not. Comment out the every line that has button_led if you want to use a button that doesn’t have an LED on it. Also, the Teams or Zoom windows has to be in focus for the button to work.

All code and 3D models are available via the Github Repository: https://github.com/jfurcean/CircuitPython-MuteButton

Special Note About Cura

I noticed that my QT Py was constantly resetting/not working while I was working on this project. It turns out that Cura was trying to “talk” to the QT Py and this was preventing it from working. Everything worked as expected once I closed Cura and reset the QT Py. I found this Github issue related to other CircuitPython boards that were having this same issue.

COVID-19 RGB Matrix with CircuitPython

I built a scrolling COVID-19 Tracking RGB using Adafruit’s new MatrixPortal M4, CircuitPython, and the API from The COVID Tracking Project at The Atlantic

Data

The COVID Tracking Project at The Atlantic has a simple API with a robust data set that is published under a Creative Commons CC BY 4.0 license.

We collect, cross-check, and publish COVID-19 data from 56 US states and territories in three main areas: testing, patient outcomes, and, via The COVID Racial Data Tracker, racial and ethnic demographic information. We compile these numbers to provide the most complete picture we can assemble of the US COVID-19 testing effort and the outbreak’s effects on the people and communities it strikes.

The Covid Tracking Project at The Atlantic

CircuitPython Code

The below code is based on the: Example: Simple two-line text scroller

https://gist.github.com/jfurcean/07146f443cfb9f94043d1d0c349a2da7

Custom 3 Button CircuitPython Keyboard

Introduction

I have been doing audio editing for side project at work. These are long form audio recordings of an hour or more. I am using Adobe Audition to do my editing. After doing several of these, I noticed that I use two main functions frequently.

  1. ‘Silence’
  2. ‘Ripple Cut’ -> ‘ Time Selection in All Tracks’

The ripple cut function either used a significant number of mouse clicks or keyboard shortcuts that required both hands. There are probably a few different potential solutions to this problem. I could have changed the keyboard shortcuts to something else, but I wanted this to be easy to use and I wanted to be able to use it on any computer.

I recently completed a project that used the PyPortal to send keyboard commands to my computer to open applications. Also, I had purchased an Adafruit Trinket M0 recently and wanted to build a project with it, so I decided to build a mini keyboard that only had a few buttons.

Parts

Schematics

Code

I modified the the Trinket IO Demo code. I removed some stuff that I didn’t need and had to make sure that holding down a key was treated the exact same as a single key press.

https://gist.github.com/jfurcean/711fb3760710c8d064d40500617fd75b

Results

The first button is used for play/pause, the second button is used to do the ripple cut and the third button is used to do the silencing. This tool has made it so much easier to edit audio content.

Update – 18 April 2020

If you liked this, check out this much more detailed project by Glen Akins (@bikerglen)

PyPortal App Launcher

Introduction

PyPortal is a microcontroller that can be programmed using CircuitPython. It has a touchscreen and can be used as a emulate a keyboard and mouse. For this project, we will create a touchscreen with icons that will allow us to launch applications when pressed.

  1. Design: discussions how the touchscreen image and layout are created.
  2. Shortcuts: Create Keyboard Shortcuts to Launch Applications in macOS ( Windows)
  3. Code: CircuitPython code to be added to you PyPortal

The code and design files can be found on Github.

Design

The PyPortal initializes rendering a background image that is .BMP (bitmap image). So I created a template background image that I could insert icons into using Adobe Illustrator. Using this file, I copied and pasted my icons on to the location I wanted and then deleted the while squares underneath.

Icon template file. 3 rows of 4 icons 50×50 pixels. – button-template-12.ai

In order to detect button presses we need to know the boundaries for each icon. The image below shows the pixel length to each border.

Annotated background icon image.

Columns are organized from left to right, from A to D. Rows are organized from top to bottom, from 1 to 3. Please see the below table.

ABCD
1A1B1C1D1
2A2B2C2D2
3A3B3C3D3

We need to know this information in order to determine if an icon is pressed. A touch event returns an (x,y) point with (0,0) being the top left corner. All icons in column B can only be pressed if the x of the touch event is between 97.5 and 147.5. Likewise, all icons in row 1 can only be pressed if the y of the touch event is between 100 and 150. Therefore, if the touch event returns (100,130), then the icon located at B2 has been pressed.

Shortcuts

The easiest way to launch applications using CircuitPython is by sending keyboard commands to your computer. In order to accomplish this on a macOS we need to create these keyboard shortcuts. This is fairly trivial on windows.

  1. Launch Automator on your mac
  2. Create a new “Quick Action”
    1. File -> New -> “Quick Action” -> Choose
  3. Under actions search for “Launch Application”
  4. Drag “Launch Application” into the window
  5. From the drop down list select the application that you want to open
  6. Switch the “Workflow Receives” drop down to “no input”
  7. Save your quick action
    1. Either CONTROL+S or File -> Save
  8. Close Automator
  9. Create the keyboard shortcut to activate the “Quick Action” you created
    1. Go to Settings -> Keyboard
    2. Click on the Shortcuts tab
    3. Select Services
    4. Scroll to the General section near the bottom.
    5. Highlight the “Quick Action” you created and click the Add Shortcut button.
    6. Press the keyboard keys that you want to set the shortcut to.
    7. I used “ALT+CONTROL+SHIFT+COMMAND+[FIRST LETTER OF APP]” for each of my shortcuts. I did this because I knew there would be no other shortcuts using this combination.

Code

The code has comments throughout and they should explain everything. If you have questions please feel free to email me or DM me on twitter. You will need to copy the below code as code.py in the root of your PyPortal as well as you BMP icon file. Please update the below code with your keyboard shortcuts and the name of your BMP icon file.

https://gist.github.com/jfurcean/b2e4d85142a1e519b234564199ad25fb

Humble Book Bundle: Hacking for the Holidays by No Starch Press

No Starch Press is here with a bundle of books flung over their back, Santa-style. Get Serious Cryptography: A Practical Introduction to Modern Encryption, Black Hat Python, Android Security Internals, and more. Happy hacking holidays to you!

  • $571 worth of digital books
  • Pay what you want
  • DRM-free
  • Multi-format

https://www.humblebundle.com/books/hacking-for-the-holidays-books

Pay $1 or more

  • The Tangled Web: A Guide to Securing Modern Web ApplicationsMichal Zalewski
  • Silence on the Wire: A Field Guide to Passive Reconnaissance and Indirect AttacksMichal Zalewski
  • Metasploit: A Penetration Tester’s GuideDavid Kennedy, Jim O’Gorman, Devon Kearns, and Mati Aharoni
  • The Car Hacker’s Handbook: A Guide for the Penetration Tester – Craig Smith
  • Practical Forensic Imaging: Securing Digital Evidence with Linux Tools – Bruce Nikkel

Pay $8 or more to also unlock

  • Android Security Internals: An In-Depth Guide to Android’s Security Architecture – Nikolay Elenkov
  • Gray Hat C#: A Hacker’s Guide to Creating and Automating Security Tools – Brandon Perry
  • Practical Malware Analysis: The Hands-On Guide to Dissecting Malicious Software – Michael Sikorski and Andrew Honig
  • iOS Application Security: The Definitive Guide for Hackers and Developers – David Thiel
  • Black Hat Python: Python Programming for Hackers and Pentesters – Justin Seitz

 Pay $15 or more to also unlock

  • Pentesting Azure Applications: The Definitive Guide to Testing and Securing DeploymentsMatt Burrough
  • Hacking: The Art of Exploitation, 2nd Edition – Jon Erickson
  • Serious Cryptography: A Practical Introduction to Modern Encryption – Jean-Philippe Aumasson
  • Penetration Testing: A Hands-On Introduction to Hacking – Georgia Weidman
  • Attacking Network Protocols: A Hacker’s Guide to Capture, Analysis, and Exploitation – James Forshaw
  • 35% Off Select Print Editions at No Starch Press