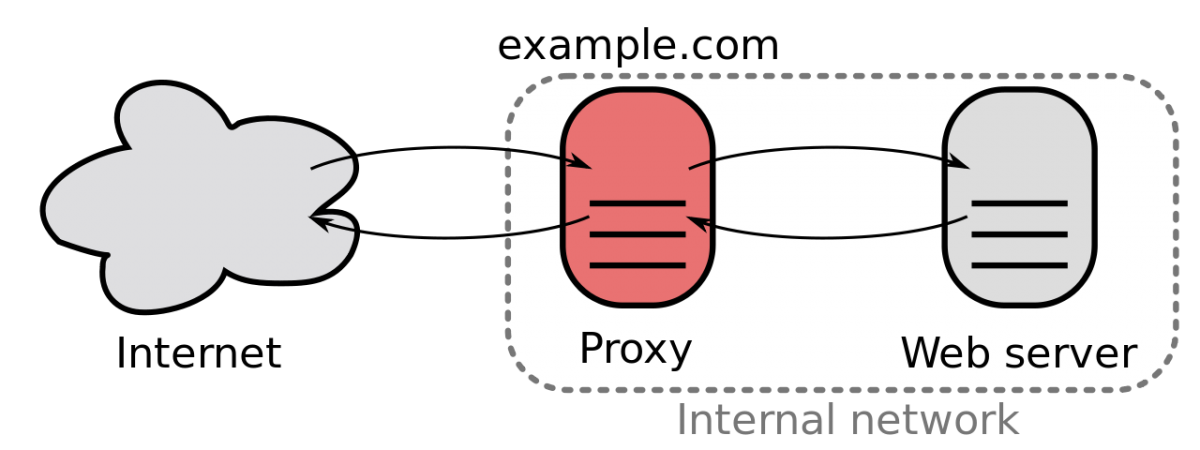
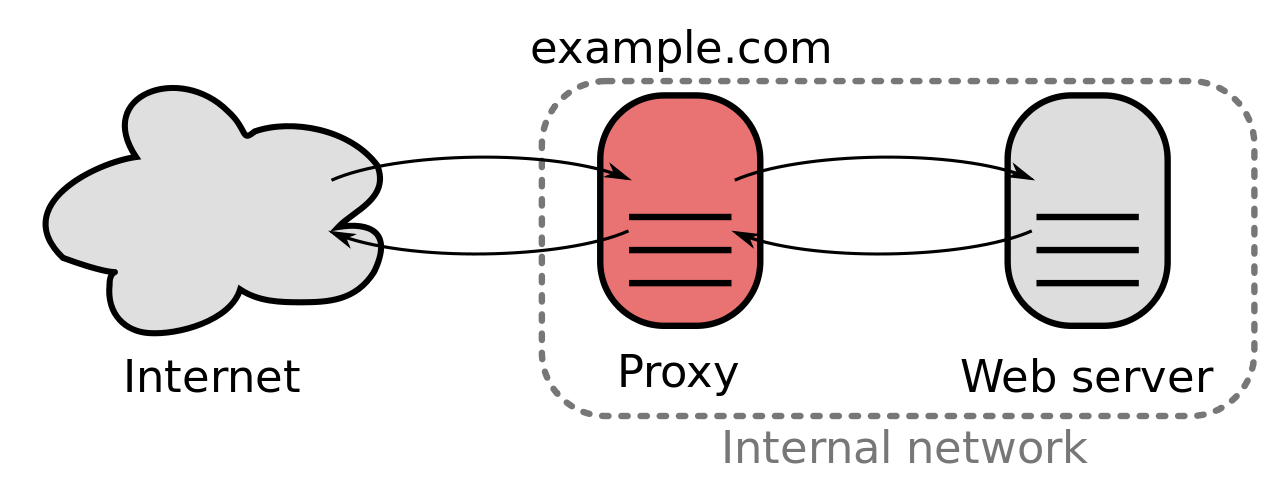
I have been doing website migrations and have been updating the DNS entries of these websites to point at the new server’s IP addresses. I have been getting major propagation delays on my personal devices when checking the sites I have migrated. It took me a little while to realize that this was most likely a Cloudflare DNS issue. When I switched my personal devices DNS servers to Google’s (8.8.8.8) and they worked.
Google DNS was used to circumvent Turkey blocking Twitter, ultimately leading Turkey to block Google DNS in 2014.
I use Cloudflare DNS on all of my personal devices. I mainly do this for privacy and security reasons. They also have simple instructions to set it up on numerous devices.
iPhone
Android
MacOS
Windows
Linux
Router
Solution
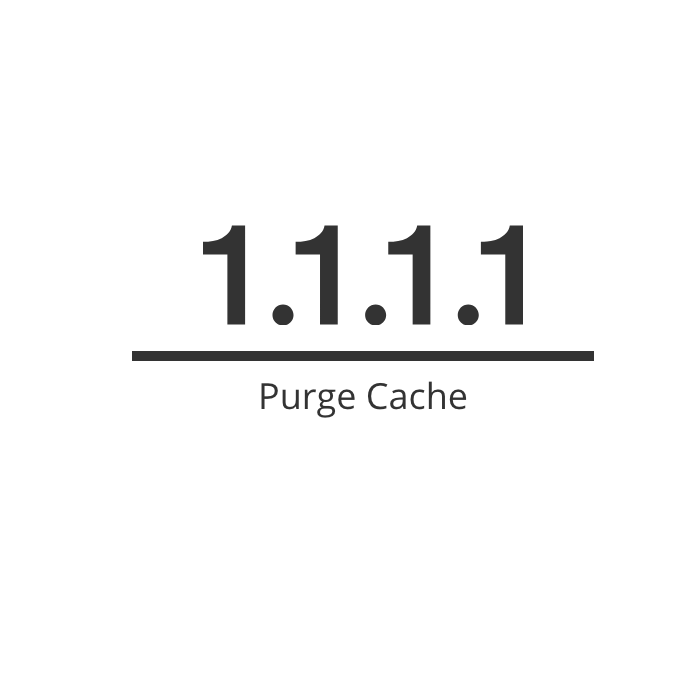
After doing some googling, I stumbled across 1.1.1.1 Purge Cache. Everything worked as soon as I used this tool. It took me a while to find this tool as most of the results relate to propagation delays related to using CDN tool that Cloudflare provides.
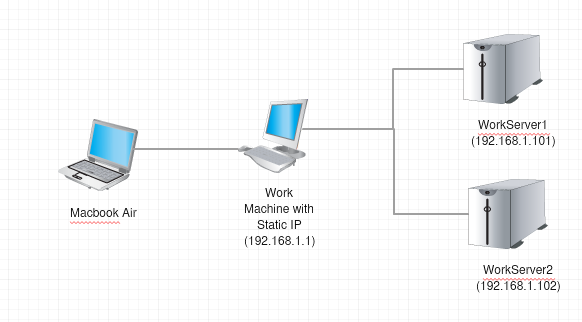
I can only access certain servers at work over SSH if I am using a machine with a certain static IP address. I wanted to be able to mount the servers file space using SFTP on a Macbook Air when I am either at home or at a remote location. I investigated a lot of different ways to accomplish this with little success. After a lot of trial and error I was able to create a Socks proxy to my work machine using ssh and then mount the server file systems by using Cyberduck and enabling the use of the socks proxy.
Network Diagram
First, I needed to create the socks proxy. In order to do this I had to SSH into my work machine and dynamical forward a port 8080. You may forward any port that is not being used greater than 1024. This will send any traffic on that port through the tunnel and out of the machine that you are connected to.
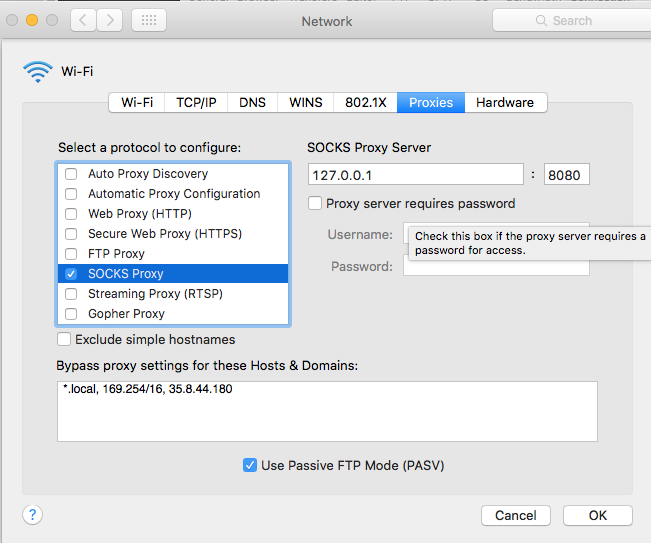
After I have created the SSH connection with the dynamic port forwarding, I enabled the socks proxy in OSX Network Preferences -> Advanced -> Proxies. Check the “SOCKS Proxy” box. Then, set the “SOCKS Proxy Server” to 127.0.0.1:8080. Finally, add the IP or Domain of the machine that has the SSH connection to the “Bypass proxy settings for these Hosts & Domains” box.
OSX SOCKS Proxy Settings
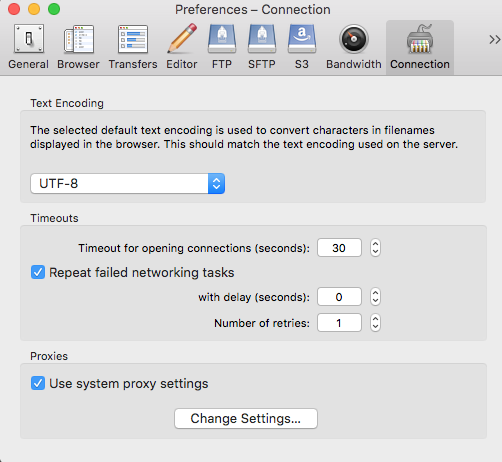
Now enable the proxy in Cyberduck. Go to “Cyberduck” -> “System Preferences” -> “Connection” and check the box that says “Use system proxy settings”.
Cyberduck system preferences for proxies
Now every connection in Cyberduck will flow through your SOCKS proxy that you set up so you can mount the remote server file system over SFTP.
I was launching a new WordPress website at work that was developed by an outside agency. This site was using twitteroauth built into the theme to access the twitter API. Where I work all the web servers are behind a firewall with a strict whitelist for all incoming and outgoing connections besides the incoming HTTP and HTTPS requests. This makes it difficult to access the twitter API because it could be a different IP address every time. To solve this issues my work provides a proxy server to make requests out to. So my research began.
Unfortunately, the developers built the twitter api into their theme so I had to manually track down the API calls to modify them to use the WordPress configuration settings. In the twitteroauth.php file in the themes folder I was able to add three lines to the
curl_setopt parameters to function http (http://php.net/manual/en/function.curl-setopt.php):
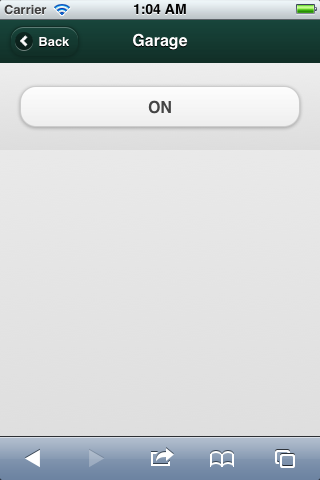
On an episode of Hak5 they discussed setting up a garage door to be opened with a mobile device. Unfortunately, the audio was missing on the section where they discussed building/configuring the actual hardware to operate the garage door. This episode inspired me to start working on some home automation that could be accessed with any internet capable device without the need to install any software on the device. I wanted to be able to control several lights throughout my house and my garage.
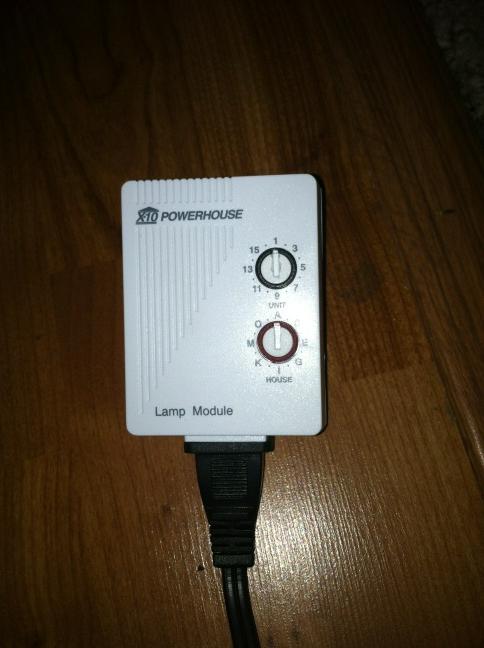
I decided to use x10 to give me a starting point.
X10 is an international and open industry standard for communication among electronic devices used for home automation, also known as domotics. It primarily uses power line wiring for signaling and control, where the signals involve brief radio frequency bursts representing digital information. A wireless radio based protocol transport is also defined – wikipedia
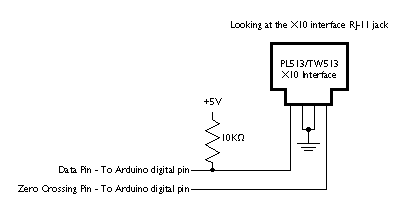
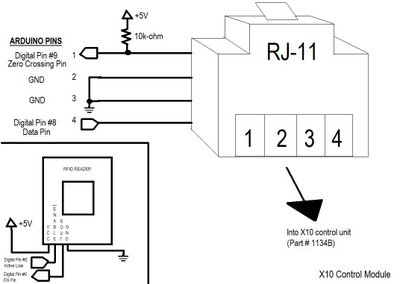
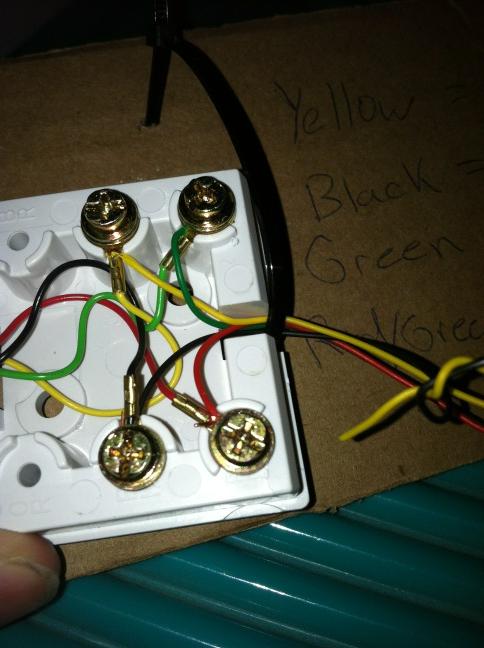
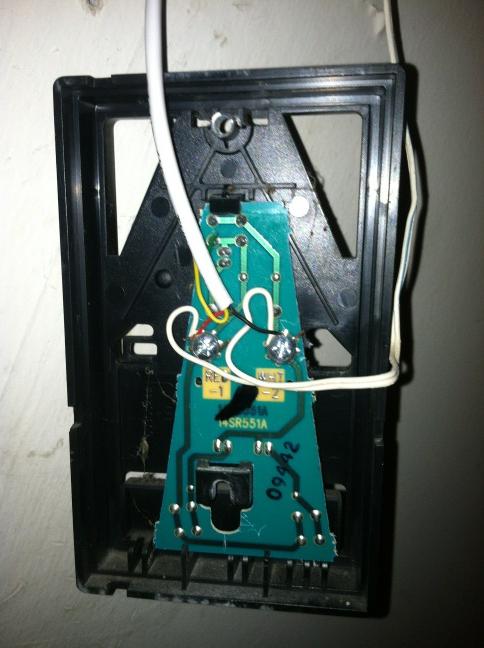
Follow the wiring schematics below for wiring your Arduino to an RJ11 Jack.
Data Pin = Pin 8
Zero Crossing Pin = Pin 9
First, wire the 5v connection on the Arduino to the 10KΩ resistor. This will be wired to the data pin 8. Second wire data pin 8 to the black wire on the RJ 11 surface jack. Wire the green and red wires on the RJ11 surface jack together and wire them to the ground pin on the Arduino. Finally wire the data pin 9 to the yellow wire on the surface jack (sometimes you may have to swap the data pin and the zero crossing pin depending on if the RJ11 cord is a cross over or not)
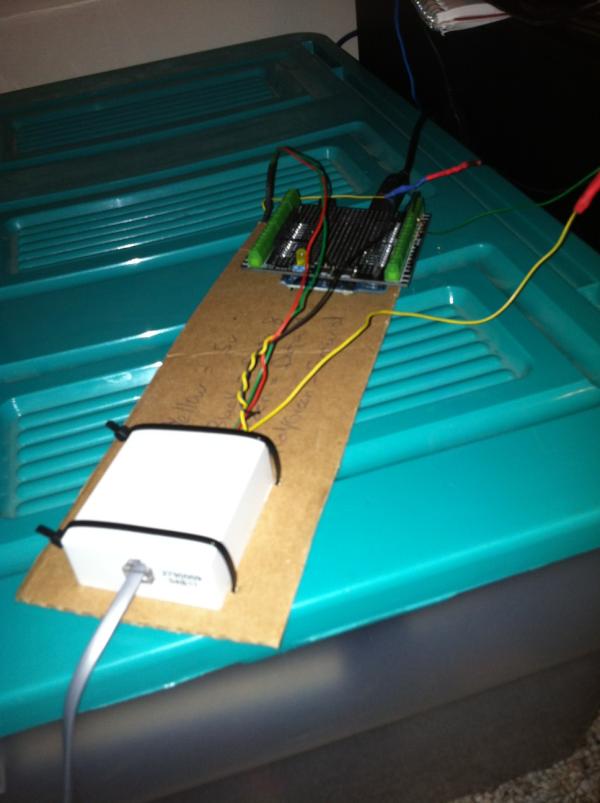
Push the arduino/x10House.pde to the arduino. This code reads data in the form of ascii characters over the USB. It converts the characters into x10 byte codes that are used with the x10 Library. It then uses the x10 Library to push x10 commands out to the PSC04 moudle over RJ11.
Step 2: Configuring the Webserver
A webserver running PHP with an open USB port is required. I used a LAMP server running Ubuntu 11.04. Drop the contents of www from my github repository into your active web directory. Inside index.php you must set $serialPath to the path that your arduino is connected to. For example
$serialPath = “/dev/ttyUSB0″;
If your using Apache as your webserver you must allow Apache to write to that path name.
sudo chgrp www-data /dev/ttyUSB0
sudo chmod 775 /dev/ttyUSB0
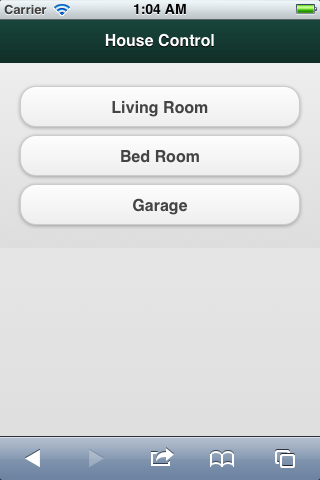
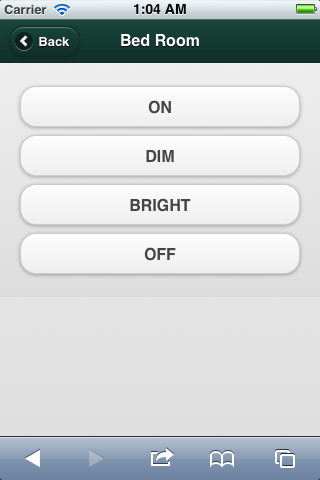
The web application reads config files to display certain x10 actions. When viewing the web application you need to make sure userName set. For example:
http://192.168.1.101?userName=john.
This will then use john.xml as the config file. The config file determines what stuff you can control.
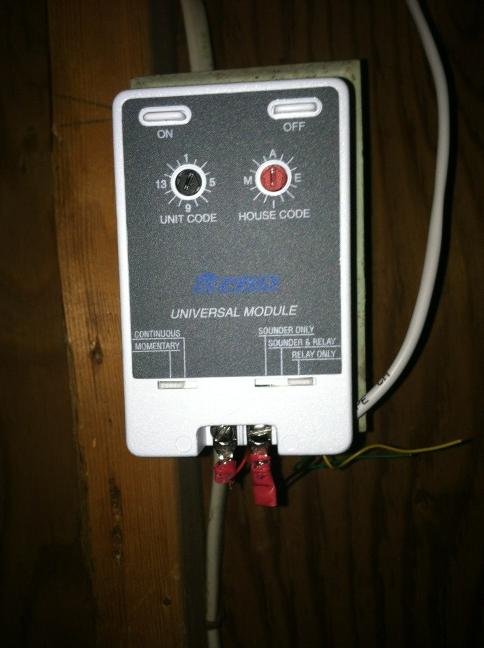
All that is left is to plug any lamp into a lamp module, an appliance into an appliance module or wire a garage door, sprinkler, etc to the universal relay module.
Step 4: Enjoy
Enjoy being able to control your house from any internet capable device connected to your network

